
Caching enables you to store a backup of your website data on servers worldwide, significantly improving user access speed. With Cloudflare, you can cache not only images, videos, CSS, and JS files on your website, but also the entire web page. If your page content is mostly static and doesn’t change frequently, it is highly recommended to use Cloudflare’s WordPress Caching tools. Below, I will explain how to enable it with Super Page Cache for Cloudflare.
Why use Cloudflare to Cache Your Website?
Improve Website Performance
Cloudflare WordPress Cache can improve the performance of your site, including response speed, interaction speed, and visual stability.
This can improve your “Core Web Vitals,” which are a set of signals that Google considers important in evaluating the user experience of a web page.
The Core Web Vitals focus on 3 elements:
- Loading speed, specifically the time it takes for a page to display its largest visible element. In technical terms, we refer to this as Largest Contentful Paint (LCP).
- Interactivity, which measures the reactivity of a web page (e.g., the time elapsed between the moment a visitor clicks on a link and the page loads). This is known as First Input Delay (FID).
- Visual stability (Cumulative Layout Shift, CLS). Your page should not have too many changes in element positions as it loads.

Good For Search Engine Optimization (SEO)
Starting from May 2021, Google has recognized web page experience as a crucial factor for ranking on search engine result pages. By using Cloudflare WordPress Cache to enhance your website’s Core Web Vitals, you can significantly improve the web page experience. As a result, your website will receive more impressions on Google and attract a larger number of visitors.
First Please Add Your Site to Cloudflare
- Log in to your Cloudflare account and go to the Dashboard.
- In the top navigation bar, click on
Add siteto start adding a website.

- Enter the website domain and click Continue.
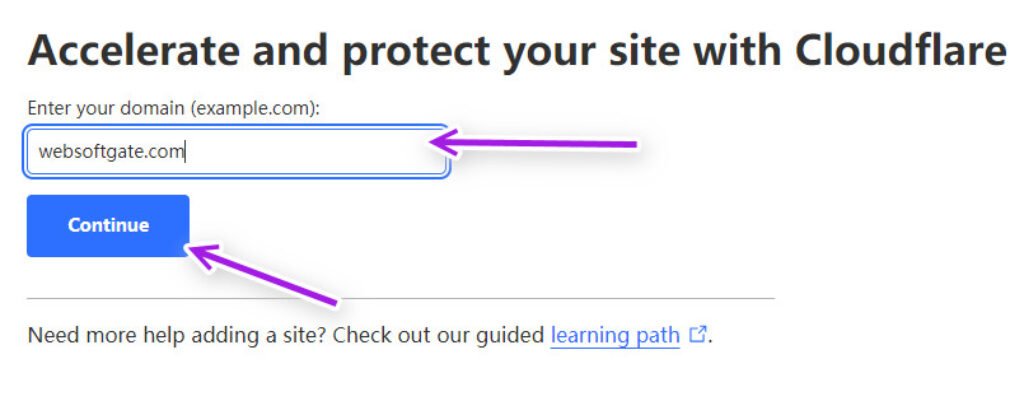
- Select the free plan.
- Review your DNS records and update your website to Cloudflare’s nameservers.
For more information, check out the detailed tutorial on how to add a website to Cloudflare.
How to Set Up Cloudflare to Cache Your Website
Download Super Page Cache for Cloudflare Plugin
You have the option to manually set caching in the Cloudflare panel, but using a plugin would provide more flexibility. In the WordPress dashboard, you can easily change caching settings and view non-cached versions of pages whenever needed.
The best plugin for Cloudflare caching in WordPress is Super Page Cache for Cloudflare. Click to download the plugin, and then navigate to “Settings → Super Page Cache for Cloudflare” to start the setup.

Get your Cloudflare API Token
The plugin requires an API Key to connect to your Cloudflare account. You can find this key in the Cloudflare Dashboard.
To locate the API Key, follow these steps:
- Click on the Profile icon in the top navigation bar.
- Select “My Profile” from the dropdown menu.
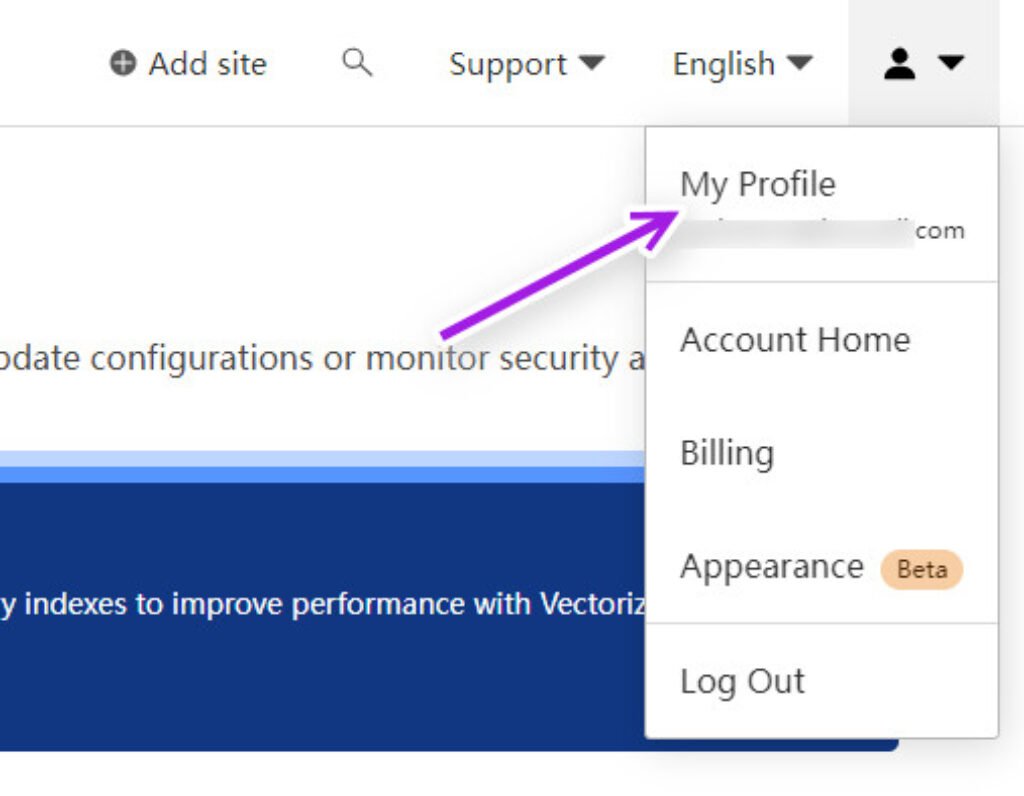
- In the left sidebar, click on “API Tokens“.
- Find the Global API Key in the interface and click “View“.
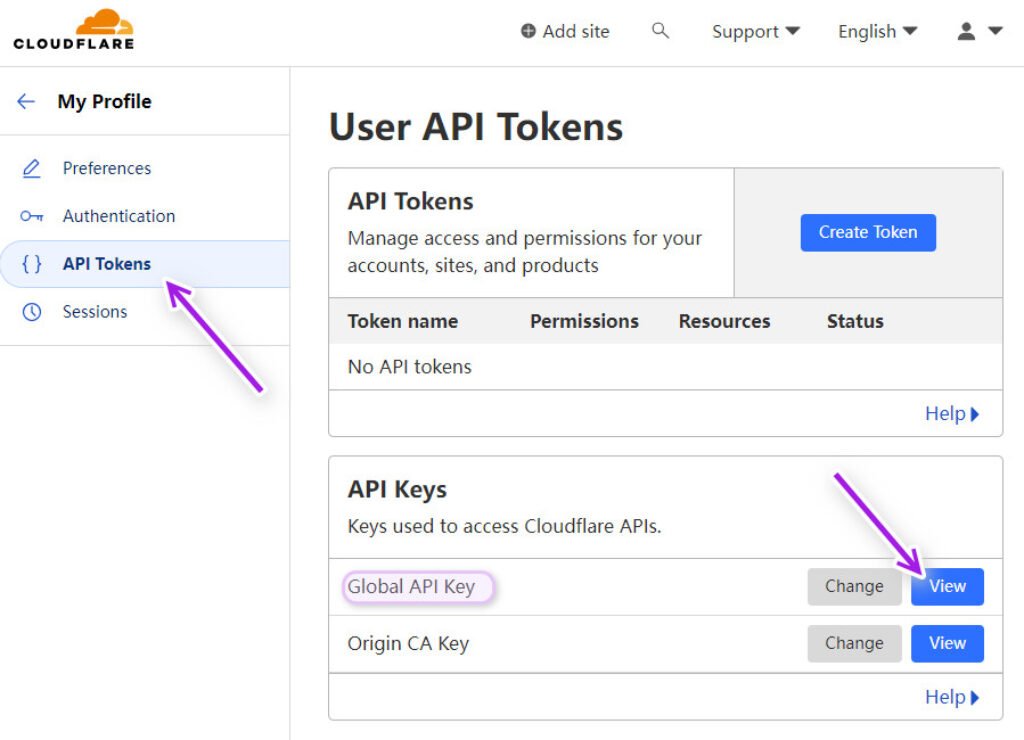
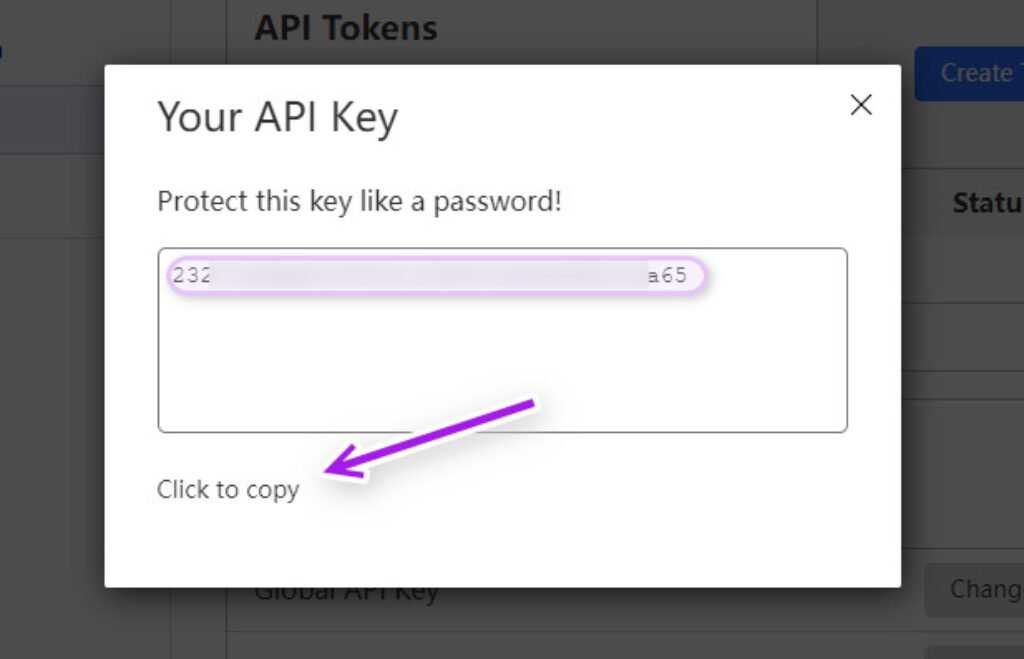
Cloudflare will prompt you to enter your account password for authentication. Once authenticated, you will be able to view your API Key. Please exercise caution and do not share this key with others, as it could compromise the security of your website.
Make sure to copy the API Key for future use.
Enable & Test Page Caching
To enable page caching, select the domain name that you want to cache, click on “ENABLE PAGE CACHING NOW“, and you will receive a prompt confirming that “Page cache enabled successfully“.

Once you finish setting up, you can manage the turning on and off of the Cloudflare Cache for WordPress on the Setting page. To do this, simply click the button as indicated in the image below.

Besides, you can also test if the plugin is working properly by using the TEST CACHE button.

Changing the Default Settings
Actually, the default settings of Cloudflare Super Page Cache are already good enough for most people, but you can still optimize these settings according to your preferences.
You can make changes to the settings on the Cache tab of the setting page.
For example, personally, I would adjust the switch “Purge HTML pages only” to “Yes” – I usually only modify the content of my blog, so there is no need to update other assets.

Test if Cloudflare Cache for WordPress is Working Well
I recommend using your browser’s incognito mode to test if the plugin is working. Incognito mode does not save website cookies, allowing you to see the latest version of your website.
- To begin, open your browser’s incognito mode and load your website.
- Press F12 on your keyboard to open the development tools in your browser, then select the Network tab.
- Refresh the page, and the developer tools will display the loading process of the webpage’s resources. The first resource loaded is usually the webpage URL, click to select it.
- In the Headers tab on the right side, check the Response Headers section, as shown in the image below.

If the cache plugin is working, you will see a response header called “cf-cache-status” with a value of “HIT“. If you see a value of “MISS“, it means the plugin is not working properly.
Testing Performance with Cloudflare WordPress Page Cache
Once these steps are done, we can check how Cloudflare Cache affects the performance of the website.
To check how well the website is performing, we used GTmetrix. The results can be seen in the image below. My website got an A grade for performance, and all speeds were rated as Good.

This performance is better than most web hosting and caching plugins. As we said before, a good website experience helps improve the website’s ranking in search engines. That’s why we’re working to make the website faster.
How to Access Non-Cached Version of Webpage
If you want to view a non-cached version of a webpage, you can do so by adding “?swcfpc=1” to the end of the webpage URL.
For example, if you want to access the non-cached version of the webpage https://websoftgate.com, you should change it to https://websoftgate.com?swcfpc=1.
By adding this parameter, Cloudflare will bypass the cache and direct you to the original version of the page.
Additionally, please note that it will automatically append “swcfpc=1” to the end of all links on your page, so there is no need to manually add these codes each time.
Start using Cloudflare to Cache Your Website
This article might be a bit long, so let me summarize the main points for you. In this article, you should understand the following key points:
- Caching your website with Cloudflare can greatly improve website performance.
- The Super Page Cache for Cloudflare plugin is the easiest way to cache WordPress websites with Cloudflare.
- How to install and set up the Super Page Cache for Cloudflare plugin.
- How to check if the cache plugin is working correctly.
Cloudflare Cache significantly improves website performance, surpassing many web hosting services and can be an alternative to expensive hosting. If you’re interested in the Cloudflare Cache WordPress plugin, you can download it from the following link:


