I have been using namesilo as my domain registrar for many years. Recently, I discovered another excellent option: dynadot.
Dynadot is an ICANN-accredited domain registrar and web hosting provider founded in 2002, headquartered in San Mateo County, California. The company has expanded internationally with offices in Beijing, Zhengzhou, and Toronto. Today, Dynadot serves customers across 108 countries and manages over 4.5 million domain names—a scale that reflects its strong market position.
Dynadot’s impressive scale demonstrates its ability to deliver features that resonate with customers.
Dynadot vs. Namesilo: Which is Better?
Most of my domain names are hosted on NameSilo because their prices are reasonable and they provide free privacy protection. However, after learning more about Dynadot, I may be inclined to use Dynadot for the following reasons:
- Dynadot and NameSilo have similar low prices and both offer free privacy protection.
- Dynadot supports multiple languages and has faster access speeds compared to NameSilo.
- On Dynadot’s checkout page, you can easily see the renewal price for the second year.(Price Transparency)
- Dynadot has a more modern interface, while NameSilo’s interface appears somewhat outdated.
- Many of my friends have been using Dynadot for a long time, and overall, they find the service to be secure and stable.
It appears that Dynadot has more advantages. However, if you are concerned about the smaller scale of Dynadot, it is still recommended to choose NameSilo.
Important Notice:When registering a domain on Dynadot, please ensure that you provide your correct birthday when prompted. If you don’t do this, you might not be able to transfer the domain later.
How to Register a Domain at Dynadot?
- Go to the Dynadot official website, type the domain name you want to register into the search bar, and then click the search button.

- If the domain name is available according to the search results, click the ‘Add to Cart‘ button on the right.

- After putting the domain name in your cart, click the ‘View Cart’ button at the top right.

- On the shopping cart page, you’ll see offers for free privacy protection, Website Builder, and Email accounts from Dynadot. Just pick how long you want to register for, then hit the checkout button.

- Create an account on the newly opened page. If you’re not comfortable with English, you can switch to a language you’re familiar with in the bottom left.

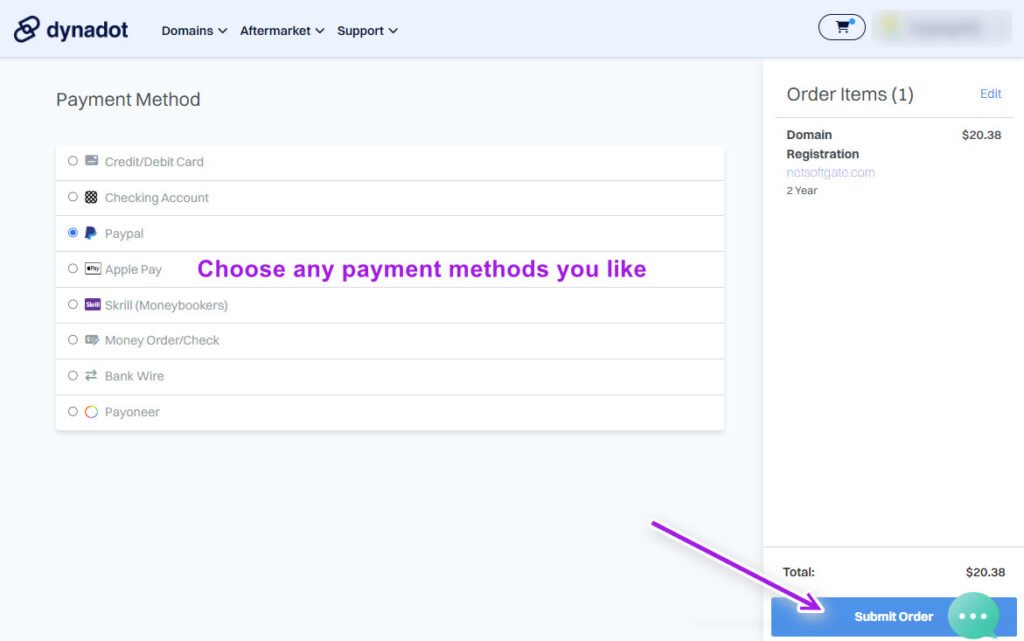
- After creating the account, you will see a payment method selection interface. Here, you can choose from mainstream payment methods like credit cards, debit cards, or PayPal.
Once the payment is completed, the purchased domain name will soon appear in your list of domain names.
How to Set Up DNS at Dynadot?
Dynadot’s DNS settings interface looks different from many other domain service providers. At first, it took me a while to understand it. But once I got the hang of it, I found Dynadot’s DNS settings easy to use.
- First, after entering the Dynadot account backend, select My Domains → Manage Domains from the left menu.
- Click on the domain name for more setting options.

- On the right of the DNS Settings, click on the “>” icon to enter the DNS settings interface.

- After that, choose ‘Dynadot DNS’ for adding custom DNS settings
- Choose the “Record Type” you want to use, then enter the IP Address or Target Host of your web server in the text box.
- You can also specify subdomain records in the “Subdomain Records(optional)” section the same way you do to the “Domain Record(optional)”.(Such as Email Server or MX Record available for your domain email)

- Choose Time to Live (TTL) for 5 minutes, then click Save Settings
Note: After updating the DNS settings, there will be some delay before changes take effect. Typically, it should work within half an hour, but it could take up to 2 days in some cases. Therefore, if your website is not accessible shortly after the update, please wait a little longer.